
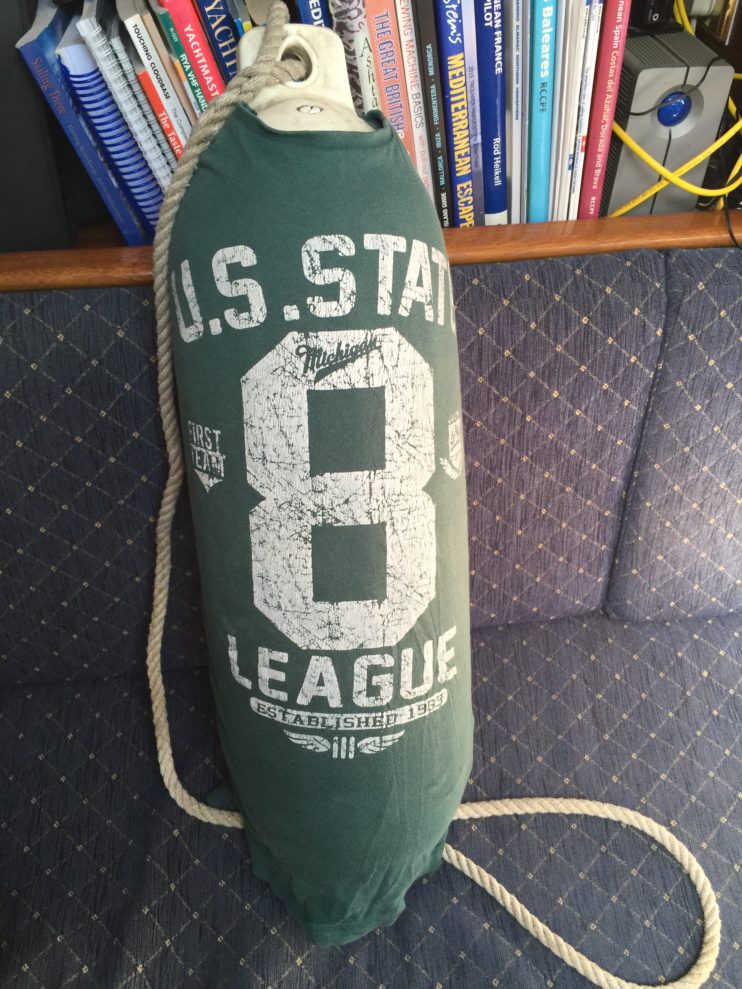
Fenders have an essential role on a boat: they are portable bumpers on the sides of the boat that prevent damage from banging into a quay or another vessel. The ones used on yachts are usually white or sometimes orange. I had noticed that some boats had covers around them: usually blue. (Yes, blue is still the favourite colour for design that is marine related). These boat fender covers are not only for decoration but also protect the fenders from becoming dirty and subsequently fouling the sides of the boat.
Jon suggested to use some of his old t-shirts to make boat fender covers. Initially I was a bit reluctant because most of the boats that did have fender covers, had matching and professional looking ones (i.e. bought in a shop). However, using your own t-shirts does give your boat a unique appearance. And why buying something that we could make ourselves?
Making a boat fender cover from a t-shirt
A few guidelines to start with:
- if your t-shirt has a print on the back and the front, make sure both it will fit such that both sides will be completely visible. You don’t want a printed text cut off in the middle.
- I made all t-shirt ‘to measure’ for a specific fender. We had fenders of different sizes and depending on the size and print on the t-shirt I picked the most suitable one.
- Don’t stress about a perfect fit. Nobody is going to notice a little fold here or there.
On to the real work:
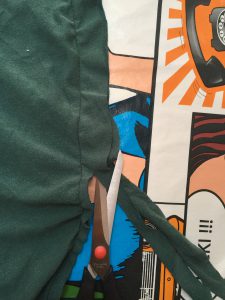
- Put the t-shirt inside out on the fender and roughly pin the shape of it. Keep an eye on the collar: it’s easiest to keep it in one piece but if it is too large you may want to make it smaller. At this stage it’s important to make sure that whatever print is on the t-shirt will not be cut off. I start pinning on the sides (about two-thirds down) and then pin my way up. Don’t worry if you have to gather a bit of fabric at the top. This is where you don’t have to stress about a perfect finish. Don’t pin all the way down to the bottom of the t-shirt but only until the end of the straight bit of the fender. This is so you know how far to stitch.
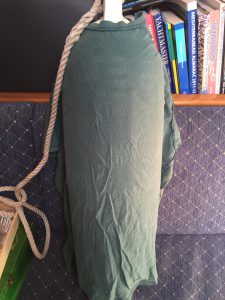
- Take it off the fender, turn it the right side out and ensure your prints are visible. Also check the back!
- Put it back inside out and cut off the sides and sleeves of the t-shirt, approximately 2 to 3 centimeters from the pin. If you are not so sure about your pinning leave even more. We’ll tidy this up later anyway, it is mainly to reduce the amount of fabric while sewing. And also to help giving a general idea of the sewing lines
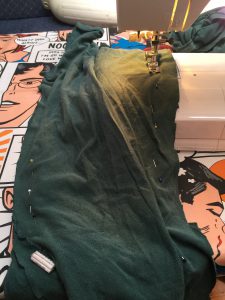
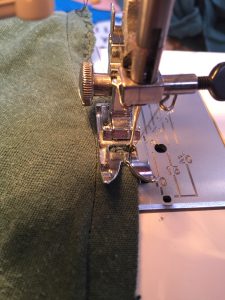
- On the sewing machine, stitch the pin lines with a normal straight stitch. I like to start at the top (the collar) for both sides of the t-shirt so at least they are evenly attached. Make sure to backstitch at the end of your pin line (see last comment in step 1) and not to go all the way to the bottom of the t-shirt. In my example I stopped about 10 centimetres before the hem of the t-shirt. Note also how the front and back in the photo are not the same length! Due to the fender being a different shape than a human, a t-shirt doesn’t fit it the same way.
- Now that you’ve sewn the basic shape, turn it back the right way around and put it on your fender. Of course if you’re not happy, now is the time to make some fixes if necessary.
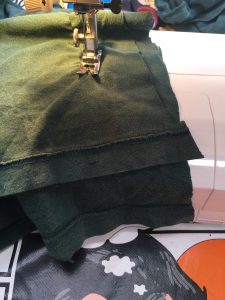
- If it looks ok, turn the shirt back inside out and tidy up the seams. There are standard sewing techniques for doing this, which you can apply. I do the following: cut the seams back to 1 cm from the stitching. Then I use the overcast stitch on both seams, like this:
- Now there’s just the bottom to take care of. Keeping the t-shirt inside out, put it back on the fender and pin a few pins for the desired length. I make sure it covers the straight bit of the fender before it tapers down. Again, there are various ways to make a hem. I cut about 2 centimeters away from the pinned line. Then fold it over twice (1 centimeter each fold), pin it, and then stitch it with a straight stitch.
Making the end result something like this:
